Before diving straight into the Pix2Pix, let’s first understand what is Generative Adversarial Network aka GAN? What makes them so ‘fascinating’?
GAN belongs to set of generative models, it means that these models are able to produce/ generate new content. So given a training dataset, this technique learns to generate new data with same statistic as the training dataset. For example, a GAN trained on facial images, can generate a new photographs that look at least superficially authetic to a human user, having mnay realistic charactertisc.

What is Image-conditional GAN?
GAN models are capabale of generating new random plausible examples for given dataset, there is no way to control the types of images it produces. So to overcome this problem conditional GAN or cGAN was built, that involves the conditional generation of images by a generator model. So in simpler words we can say that, Conditional GAN or cGAN is the task of generating new images from a dataset conditional on their class.
What is Pix2Pix ?
Pix2Pix algorithm is one of the first successful general Image-to-Image translation algorithm. Pix2Pix used a ‘gan loss’ in order to generate realistic output images. In general, GAN models consists of two networks i.e Discriminator and a Generator. The discriminator’s job is to check if the images it got is a real image or a fake images generated from Generator network. The generator’s job is to generate fale images from a random number.
At the initial stage of training, both these two networks, i.e discriminator and generator are terrible at there job. Discriminator can’t classify between real and fake images and Generator network just generate random noise. But as they compete each with other, both these network gets better at doing there respective job. As GAN model are very hard to train, the author of Pix2Pix did not think about using GAN loss, instead they used losses such as MSELoss or L1Loss and minimized them.

However, the usage of these loss functions had a big problem, Image-to-Image is not a problem that you only have “one” correct answer. For example, if there is a grayscale image of a bus, what color was it originally? There are multiple answers; it can be blue, yellow, or green.
When you minimize the MSELoss or L1Loss, the model tends to generate “safe” images, because it’s comparing these values in pixel level, so if the model predicts the bus as “red” but is originally “blue”, then it becomes wrong even if it is one of the correct answers. Therefore the output tends to be an average of these colors like brown.
This is where Gan Loss comes into place because rather than selecting safe colors, it tends to select colors that look realistic. However, the authors find that the Gan Loss itself is unstable, therefore the final Pix2Pix loss uses both L1Loss and Gan Loss together to perform realistic Image-to-Image translation.
 Original Gan Loss, where the Discriminator is supposed to maximize this in order to classify between fake and real, where the Generator is supposed to minimize this in order to generate realistic images where discriminator thinks it is real.
By Scaling the L1Loss by a scale of λ, the final loss for Pix2Pix is this.
 The gan loss here is conditional gan, where the generator receives an image instead of random z, and discriminator receiving the input x but also corresponding y or fake y
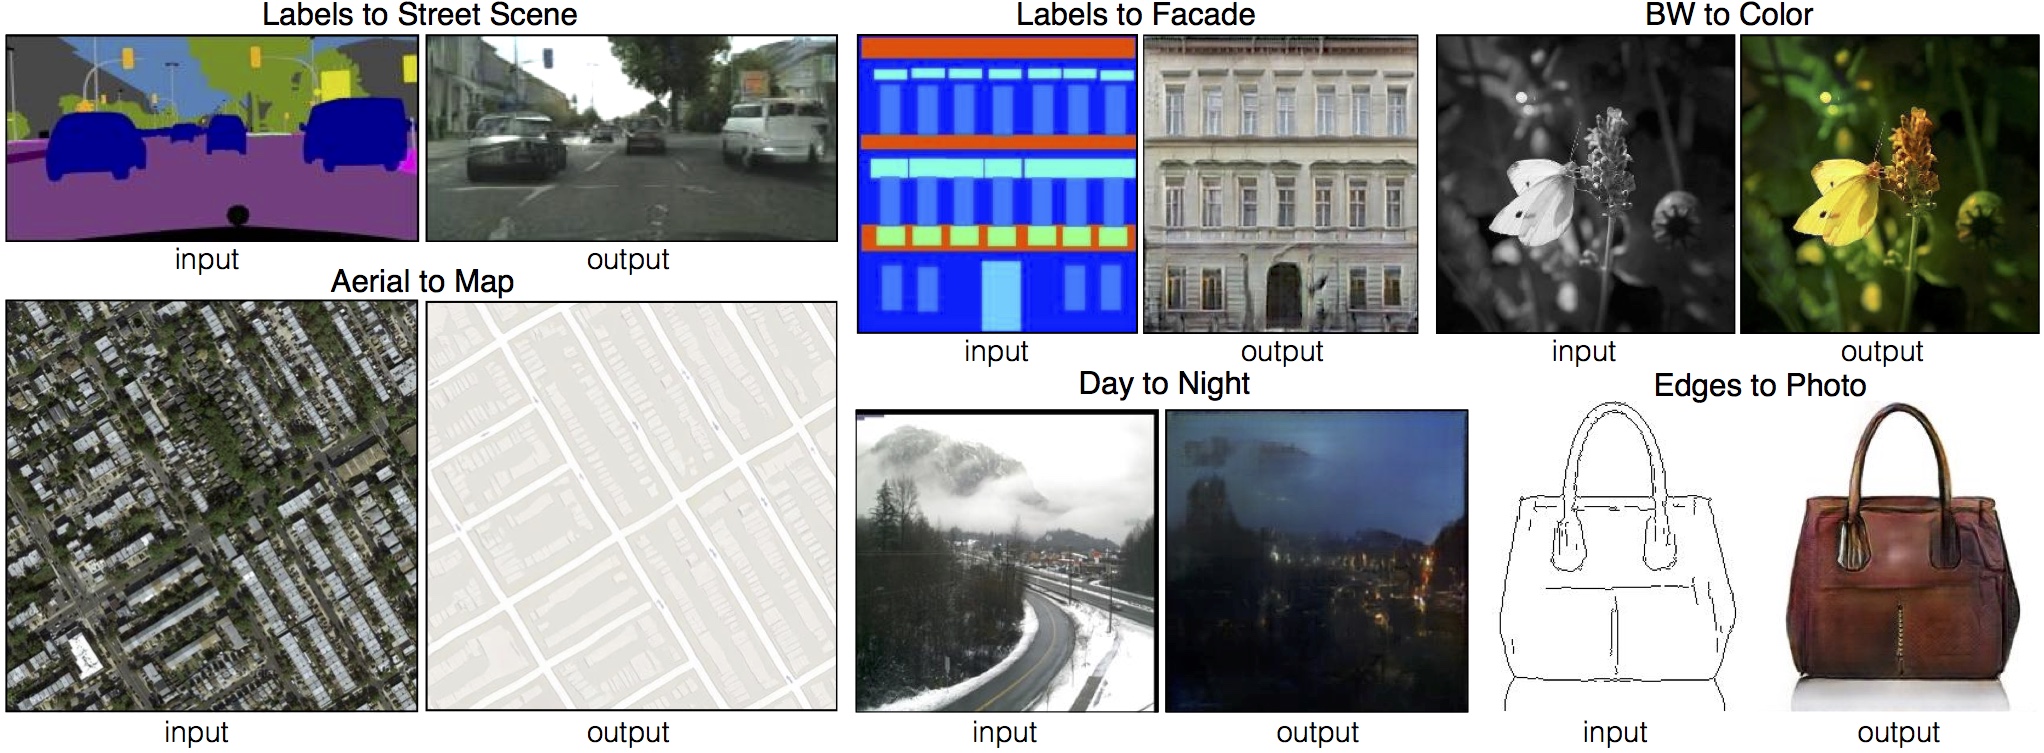 Pix2Pix examples
Generating MNIST dataset for Pix2Pix
Most of the datasets which are available to play around with Pix2Pix are quite high in resolution, which might not be suitable for most users due to limited computational resources. So to overcome that problem, I have written a simple script, which takes a simple MNIST digit dataset and generates a dataset, which we can use to train a simple Pix2Pix model on Google Colab or Kaggle kernel. It generates 128x128 input output mapped images using the MNIST dataset.
Training Pix2Pix GAN
If we take a look at our dataset, all the input-output images are horizontally stacked with each other. So at the time of loading the images, we need to divide it from the middle.
class MapDataset(Dataset):
    def __init__(self, root_dir):
        self.root_dir = root_dir
        self.list_files = os.listdir(self.root_dir)

    def __len__(self):
        return len(self.list_files)

    def __getitem__(self, index):
        img_file = self.list_files[index]
        img_path = os.path.join(self.root_dir, img_file)
        image = cv2.imread(img_path)
        input_image = image[:, :256, :]
        target_image = image[:, 256:, :]

        augmentations = config.both_transform(image=input_image, image0=target_image)
        input_image = augmentations["image"]
        target_image = augmentations["image0"]

        input_image = config.transform_only_input(image=input_image)["image"]
        target_image = config.transform_only_mask(image=target_image)["image"]

return input_image, target_image-
The getitem function will read the path of the images and crop it from the middle.
-
It also applies the random jittering and random mirroring to the input images
Code for generator and discriminator model can be found in discriminator_model.py and generator_model.py
Checkout the github repo link at the end
Make sure to change all the neccessary config inside config.py file, before training of the model.
Now, we can start training of our Pix2Pix Model.
python3 train.py-This will start the training of the model
-After each epoch it will save the PyTorch model inside of model folder
-All the validation data result are stored inside of the evaluation folder.